Free Scrub Hat Pattern and Tutorial
Scrub hats!!! Anyone making them? Just drafted a pattern as I wanted to make one for a doctor friend and, as usual, since I did the work and digitised the pattern, I also took photos of the process and I'm sharing it all here. Feel free to share the link to this blog anywhere you like for people to find it, but please don't share/post the pattern file itself.
You can download the free pattern for yourself by clicking here.
Please make sure you print the pdf at 100% scale or actual size on your printer. Please also note that you do not need to print all four pages as the pattern is exactly the same. Just print 1 and 2. I only provided the pages on metric and imperial grid for those of you unable to print it at home. In which case you can use the grid to draw the pattern yourself on a piece of paper.
Seam allowance is included at 1cm (3/8").
I used odd scraps of fabric so I have not calculated any fabric amounts for you I'm afraid. Although, I can imagine 45-50cm of any quilting weight fabric would be more than enough (roughly 1/2 yard).

You need to cut two of each layer on the fold, one of each section for the outer fabric and one for the lining. I used a cotton print for the outer layer and since I only had a limited amount and not enough to cut the top section on the fold, I added seam allowance to the centre, so I could join two pieces together without compromising the shape/size.

I had enough fabric left from making scrubs to use for the lining.


You do not need to do this if you have enough fabric, just showing you how I joined the top section so when you see the photos with a joint there, you'll know why.

Make sure to transfer all the notches.


Align the edges marked with a dashed line on the pattern, first pin the centre and side notches then continue all around.

Sew these edges together with a 1cm (3/8") seam allowance on each layer.

Place the lining on top of the outer fabric with right sides facing and align the back edges on both layers.

I am missing the actual photos for this step, so I made an illustration for it. Pin and sew together the back edges only.

Turn over and fold the two layers on top of one another with wrong sides facing now. Press the seam that you just stitched and topstitch a couple of millimetres from the edge. Align and pin together the remaining raw edges of the two layers.

Stitch about 5mm (3/16") from the edge with a basting stitch or a running stitch by hand, just to keep the two layers from shifting.

Cut a 5cm (2") wide strip of fabric. I cut across the whole width of the fabric, which is about 112cm (44") wide, and that eliminated the need for finishing the ends of the binding strip - I let the selvedge do its thing. You can also use bias binding for this step if you have any, but if making your own, just cut the fabric on the grain, no need to waste any.

Press 1cm (3/8") of one long edge towards the wrong side. The fabric I used is double sided so unfortunately you don't see which is the wrong side.

Find the middle of the binding strip and align it with the centre of the side section. Pin the raw edge of the binding strip to the raw edge of the hat on the lining side, with right sides facing. Sew with a 1cm seam allowance.

Press the seam allowance towards the binding strip then fold and press 1cm (3/8") of the other long edge towards the wrong side.

Fold and press the whole binding strip in half lengthways, making sure the newly pressed edge just covers the previous stitch.

Pin all around and stitch a couple of millimetres from the pressed edges.


All done!
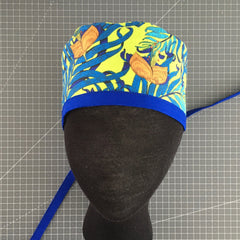

I tried it on and it fits perfectly, but wasn't sure about photos of me with it on the way my hair is looking right now... so you get to see this polystyrene dummy head that I covered with a section of some old leggings. It, otherwise has a badly crumbled nose underneath!

I hope this will be a useful addition to my recent bout of blog posts. If you make it and are happy (or unhappy!) with it, do let me know. If posting on social media, please tag with #DDscrubhat and #dhuratadaviespatterns - would love to see them!
Take care and keep sewing!
Dhurata x
Thank you. Thank you. Thank you. This scrub hat works perfectly for my daughter (see previous comment from me); I will be making more!
Oh my goodness thank you so much for being generous and sharing this pattern!! I will be making lots of them!!
Thankyou so,much for your pattern. I made 3dozen for my daughter to give to her friends at the Hospital,I she works at I. Queensland Australia.
Thank you for the great pattern! I’ve made about 20 of these for my son in law who is now a 2nd year ob/gyn resident. He gets 4 for every birthday and holiday – I’ve used tons of fabric from my stash and have sewn in personalized name labels to help identify them.
Thank you for sharing this pattern. I’m having my hip replaced next month and wanted to make a gift for my surgeon. He is a Florida Gators fan so I got Gator fabric and will make him a few caps! He will love them. This is my 4th surgery with him and he’s been so good to me!