Free Face Mask Pattern and Tutorial - updated!
Ah, sweet denial!!! I tried to dismiss the idea of home sewn fabric masks for as long as possible, but it is increasingly looking like they would be in fact much better than nothing. I made a pattern the other day that seemed to be the best fit to my face and graded it up and down a few sizes to fit the whole family. Obviously and unfortunately, I cannot at the moment test this on other non-family faces, but I would estimate it would fit anyone from about 5 years up to adult size.


You can download the free pattern by clicking here.
The seam allowance is 1cm (3/8 of an inch) and is included in the pattern!
--------------------------------------------------------------------------------------------
PLEASE NOTE: This pattern is for personal use only and its reproduction or commercial use is prohibited! Despite the famous quote that 'imitation is the sincerest form of flattery', this pattern is intellectual property to which I own the rights. You should not sell face masks made using this pattern. I have made it available for you to make masks for yourself and donate to others who might need them, but you should not profit from my good will and the horrendous situation we've all found ourselves in. I hope you can appreciate this and will understand the reason why I've had to add this here so clearly. Thank you! (01.05.2020) --- In addition to this, I will not be granting a licence or permission to anyone wanting to use this pattern for commercial use no matter the reason or personal circumstances, so please, please do not expect me to reply and explain this on endless emails as it is truly time consuming. I'd rather use that time more productively, by improving the pattern and adding features that have been requested or answer many questions from people who are making face masks for free to help others. (24.05.2020)
--------------------------------------------------------------------------------------------
UPDATE 1: please check the bottom of this blog post for info on how to insert a wire! (24.04.2020)
UPDATE 2: please check the bottom of this blog post for the optional filter pocket instructions. I have updated the original pattern to reflect this and I also sized up to include XL. Apart from slight polishing of corners, the shape of the pattern is otherwise unchanged, so you can continue to use the original print out unless you want to add a filter or make size XL (24.05.2020)
--------------------------------------------------------------------------------------------
Please print the pattern at 100% scale or actual size, (not scale to fit or any such setting on your printer). This will print on both A4 or US letter size. Please also note that you do not need to print both pages as the pattern is exactly the same. I only provided the two pages on metric and imperial grid for those of you unable to print it at home. In which case you can use the grid to draw the pattern yourself on a piece of paper.
I know there are quite a few perfectly good mask patterns out there already that are possibly even easier to sew, but I like the precise fit of this one at the nose and chin, which ensures that it stays in place without needing to be adjusted once it’s on.
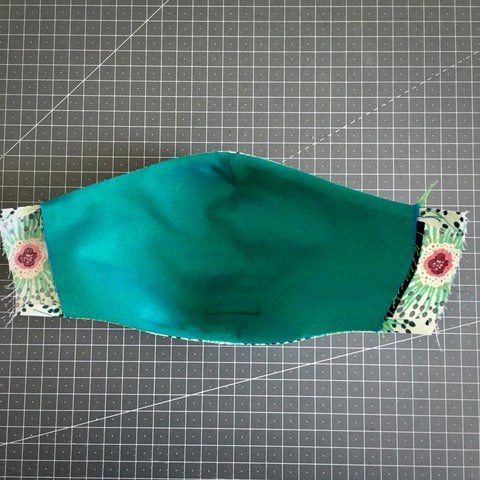
I wrote the tutorial to show you how to make this with three thin layers of cotton fabric - two woven and one knit T-shirt fabric. I used the woven fabrics for the outer layer and lining, and the t-shirt fabric for interlining (sandwiched between the outer layer and lining). The combination of three layers has been suggested as a helpful alternative to the N95 masks, which provide the appropriate level of protection against Covid-19. These are as you all know in high demand and there's a huge shortage. Fabric masks provide no guarantee and are not by any means a replacement for N95 masks so you should not be relaxing your social distancing habits when wearing it. The mask will need washing and ironing after each wear to avoid contamination. Please read about it, do your own research and make up your own mind whether this is something you will find helpful through this surreal time in our lives. I am in no position to recommend these. I am putting this out there since I’ve already created the pattern for myself and my family and wanted to share it in the off chance that someone might find it helpful, which would be totally worth it. So, here goes…
You will need:
1 x outer layer of light/medium weight woven cotton fabric, 40cm x 20cm
1 x interlining of lightweight T-shirt fabric 30cm x 20cm (you can use an unwanted clean T-shirt)
1 x lining of light/medium weight woven cotton fabric, 30cm x 20cm
If your fabrics are a little heavier weight, you can skip the third inner layer and just make it with one outer layer and one lining.

To chose your size, you need to measure from the tip of your nose to your chin. The approximate nose to chin measurements for the five sizes I've provided are below:
XS - 6.5cm
S - 7.5cm
M - 8.5cm
L - 9.5cm
XL 10.5cm (this size was added to the PDF pattern on 24.05.2020)

Fold each piece of fabric in half with right sides facing and cut one of each layer on the fold. When cutting the interlining and lining make sure you fold the pattern piece on the dotted line so these two are narrower than the outer layer.
Finger press the centre fold to make a slight crease.


With all three still folded in half right sides facing, pin the chin darts first and sew with a 1cm seam allowance. You can also mark the seam allowance before pinning.

Snip the seam allowance at the tip of each dart so you can press them open.

Fold the darts at the tips towards the centre creases with right sides facing.

Mark a line perpendicular with the dart and centre crease on each layer. The length of the line should be as follows for your chosen size: 2.5cm for XS, 3cm for S, 3.5cm for M and 4cm for L.

Sew along this line making sure to backstitch either end. This will create a T-shaped dart for the chin.

Fold each layer at the centre crease again with right sides facing. Pin and sew the nose darts with a 1cm seam allowance.

Snip the seam allowance at the nose dart tip and press it open.

Place the outer layer and the interlining together with wrong sides facing, align the top and bottom raw edges only and pin.

Sew these edges together with a basting stitch at slightly less than 1cm seam allowance.

Place the lining on top of the outer layer with right sides facing, aligning the top and bottom raw edges only. Pin and sew these edges together with a 1cm seam allowance.

Turn the mask right side out with the interlining layer sandwiched in between the outer fabric and lining.

Press the sewn edges flat with an iron and trim any threads.

Turn first 0.5cm then 1.5cm of the raw edges on the outer layer. Pin and sew close to the first folded edge.

This will form the channels for either a ribbon or elastic to be inserted through.

I had some previously made double-folded bias tape in the same fabric as the outer layer so I decided to use it up.

I folded it in half lengthways and sewed it into a ribbon. This needs to be about 120cm long to allow for tying it at the back. Same length would apply to any thin ribbon you might have in your sewing supply stash.


Attach a safety pin to one end of the ribbon and insert it through from the top on one side, then from the bottom on the other side.

Tie a knot at either end of the ribbon.

Please be aware that, like anything else tied around the neck of a young child, this could potentially be unsafe and you may want to consider other methods, like elastic around the ears instead. Or maybe split ties made with strips of stretchy fabric. In any case, please don't leave young ones unsupervised while wearing them.
If you’re using elastic, it doesn’t need to be any more than 80cm long even for the largest size. This will depend on the type of elastic as well. Try it on for size then tie the elastic ends together into a knot.
A few more examples below, where I used different types of elastic:


Let me know if you make one and found it useful. Tag #DDfacemask on social media.
Most importantly, I hope you're all staying safe, keeping busy and being creative.
Dhurata x
Click on the link to check out the latest UK government advice on STAYING SAFE OUTSIDE YOUR HOME! and especially the section on face coverings!
UPDATE 1: HOW TO INSERT A WIRE FOR THE NOSE BRIDGE!

This is something I meant to add here as an option if you wish to insert a wire. I know a few of you have already done so in order to stop glasses from fogging. This way seems easiest to me as it doesn't require any additional materials apart from the wire itself. Cut a piece of preferably aluminium wire (or straighten a paper clip if desperate) then make a tiny loop either end of it. After sewing all the layers together and with the mask still inside out, attach the wire directly onto the top (nose end) seam allowance. You will need to anchor the wire loops well so it doesn't shift. I did all this carefully on the machine using a zigzag stitch but you can also sew it by hand. Turn the mask right side out and carry on as per the rest of the instructions.

Another way to do it would be to make a channel for the wire within the seam allowance by sewing a straight stitch in the middle, inserting the wire in between the two seams, then stitching the sides shut. Again, turn the mask right side out and continue. I hope it helps!
UPDATE 2: HOW TO ADD A FILTER POCKET

Use the updated pattern to cut one outer layer, one lining and one filter pocket. You need to fold the pattern piece along the corresponding dotted lines for lining and pocket. These three fabrics should all be lightweight woven cottons. I used Liberty lawn fabric for outer and filter layer, and a cotton poplin for the lining. My thinking is that if the fabric is too thick, it might be hard to breathe after adding the filter as well. I'm not sure what would be a good material to use as the actual filter. There's lots of theories out there, so do your own research and decide whatever seems reasonable to you. I'm no expert on this and am not adding it here as a recommendation, but simply providing instructions on how to construct the filter pocket to this pattern in the simplest and most effective way I can think of right now. It's been requested many times and I hate letting you struggle to accomplish this. So, here's how I would do it:

Press first 4-5mm, then 5-6mm of both side raw edges of pocket layer towards the wrong side then pin.


Stitch close to the first folded edge.

With both layers right side up, place the filter pocket on top of the lining and pin top and bottom raw edges only as shown above.

Baste/tack along these four segments to prevent the two layers from shifting on the next step.

Treating these two layers as one now, fold in half right sides facing...

...and construct the darts as per the original instructions. Having constructed the darts for these two layers together, I've eliminated the annoying possibility of the filter riding up towards the nose or down under the chin.

You may snip that corner if you find it's too bulky at the chin. (Ignore the two rows of stitches on the chin dart above - I just a corrected a mistake!)

Now, this is a totally optional fancy bit, but if you, like Peter Lappin want to make this mask making malarky a less miserable experience and learn some construction techniques along the way, then just ride with it if you've got time. The end result is definitely more refined. Peter used a perfectly adequate technique on his blog post, but I'm adding mine here, so you get to choose. Before sewing the outer and lining together, trim the lining (as well as filter pocket in this case) by a couple of millimetres along the top and bottom raw edges. This will ensure the outer fabric is pulled towards the back a little when you turn the mask right way out, so the lining is not visible from the front.

Prepare the outer layer as per the original instructions and place the lining on top of it with right sides facing. Align the darts first then the rest of top and bottom raw edges, pin and sew with a 1cm seam allowance. Turn it the right way out, press out all the edges and create the tie/elastic channels either side.

I made a size M and this 11cm x 7cm rectangle made out of card seems to fit perfectly in the space inside the pocket, although you can definitely add to the 7cm to use up all the available space.

I have not tested the other sizes so please play with these dimensions a little to fit in the size you're making.

I used cord elastic and tied it at the bottom this time.

Even though I doubt I'll be inserting a filter on mine, this is not much different to the original three layer and it's in fact incredibly comfortable to wear due to the lightweight fabric I used. It makes a huge difference in my ability to breathe easily while wearing it.
I hope this satisfies the filter pocket fans out there and let me know how you get on. If there's anything else you'd like to know, just drop me a line.
----------------------------------------------------------------------------------------------
PHOTOS: If you would like to share a photo of your makes with me outside of social media, please email them to info@dhuratadavies.com - would love to see them!
----------------------------------------------------------------------------------------------
QUESTIONS IN COMMENTS ANSWERED! (28.05.2020)
This blog system will not allow me to reply to a comment! Annoying as it is, I can't change it. So, I've decided to answer down here anything mentioned in comments that I think will be of value to others and that hasn't been covered by the tutorial so far. I have emailed many of you individually with an answer so far, but sometimes I've had emails bounce back, etc., so if you've asked a relevant question, I'll try and answer it below within a couple of days.
- you can download the pattern by clicking the word "...here" just under the first cluster of photos. (this is a common question)
- This cloth face mask fits snug to the face. There's no plan to insert boning to the front of it. It would defeat the purpose of having no seam at the front, but I'm sure there's other designs that will allow for this.
- length of elastic for ear loops: my ears don't like the elastic loops, but I know some people prefer them. I made one to try in the beginning and the length of elastic was 17cm for each side. I inserted the elastic through the channels, overlapped the ends by 1cm and stitched them into a loop. I pulled the seamed joints inside the channel. That length (17cm) worked perfectly for size M. I have not tried the other sizes but can estimate it would be a difference of 1cm in between sizes. This may vary on individual faces so if you're making them for people in your home, it's best to test the length before stitching the loops. (11.06.2020)

- there is no plan to create additional sizes for this pattern, especially not for smaller children. (24.06.2020)
- yes, you can topstitch the top and bottom edges after turning the face mask right side out and before you sew the side channels.
- for an absolute beginner friendly video tutorial on how to make this mask, my very loyal customer and amazing fellow sewist, Alex Judge has created two YouTube videos. Click on the links below to watch. You have to watch the first before you watch the second for the filter pocket.
face mask with nose wire video tutorial
and
face mask with filter pocket video tutorial
(29.06.2020)
- 1cm is approx 3/8 of an inch (13.07.2020)
- (24.07.2020) - Beard adjustment suggestion! Please note, no beard is equal and none were used (or available even!!!) to try this adjustment on, but I'm pretty confident it would work... although it may need individual adjustments beyond my virtual capability here! For, example the horizontal chin dart might need to be wider, etc. Play with it and see how you get on.
To start, slice the pattern horizontally just below the side channel and drop it down by the amount needed. Re-draw the front centre line then adjust the under-the-chin line and cut the excess off (marked with red X on photo).
The 2cm amount I’ve added and the XL size is just an example, you can add a bit more or less and use the appropriate size for the face. The amount you add should be about the amount that the beard extends down from chin, beyond the nose-to-chin measurement. Without being rude to any long beards out there though, I think there is a limit to how long you can successfully make this face mask. I don't think you can cover a beard that extends more than a few centimetres down from the chin and I would even question the effectiveness of it, as well!
Good luck, I hope this helps to get you started!

- (04.09.2020) - yes, you can snip the little corner formed after sewing the horizontal chin dart if you wish. I mostly don't as I found it makes no significant difference.
- 14.09.2021 - download the black and white pattern file for the facemask here if you've run out of colour ink on your printer : )
I want to thank you for the mask pattern. I made a few of these mask for myself in 2020. Here we are again, I have to make some more because I left mine at home in SA and travelling to India. Thank you for this pattern.
Just wanted to add another thankyou for this pattern and clear tutorial. I made lots of these masks for the extended family when they first came into widespread use in the UK. Now with the emergence of the new variant and return to wearing masks in many settings (and during upcoming mock GCSEs for my son) it seemed time to make a new batch so returning to your instructions. The masks I’ve made have been comfortable to wear, stayed on well, washed well and worked great with glasses (with added nose wire) and I’d much rather wear one I have made myself out of decent quality cotton and interfacing than something random from the Amazon. Hopefully we won’t be in this position for too many more months but while we are I thank you profusely for your well-thought-out pattern and clear instructions.
I made several masks from your original pattern and loved the fit.
As it’s coming up to Christmas I thought I would make another from Christmas fabric, only to discober I couldn’t find it!
It took much searching to find you again, and I am so glad I did.
Many thanks for the pattern. It is brilliant.
I have been making these ever since the first lockdown here in the UK and they are brilliant. I needed to do something to keep my anxiety at bay and found this to be the perfect solution. I can use a sewing machine but I am not wonderful at sewing but these instructions are so easy to follow. I cheered myself up by buying some nice fabric off the internet for me and my husband. I have made about 20 or more of these masks for us both (my husband keeps losing his) and I have glittery stars, unicorns, flowers and other gorgeous fabric masks – everyone comments on them. My husband has Superman, Batman, Mandalorian, Captain America, Star Wars, etc (all licensed fabric purchases). Thank you so much for this pattern – I have added a metal nose strip to mine and that works really well. Thank you again for sharing this pattern.
Thank you so much for this pattern, my son (11) had to make one for his tech class during our last lockdown (NZ) and chose this one, it was easy to follow and so comfortable his siblings ended up making their own too!